The spring calving kit
The spring calving kit is one thing which should be in good order and ready to go before the first calf hits the ground, Manawatu vet Lisa Whitfield writes.


With spring upon us, it is time to think about how to improve efficiency on the farm – on days where you are up at 4am and in bed at 10pm, every minute in the day counts.
The spring calving kit is one thing which should be in good order and ready to go before the first calf hits the ground. So pull out your calving box from the shed, and take a look. Clean everything, check equipment is in working order and replace anything which has not survived in storage since last spring.
Essential equipment
Chains or ropes – for attaching to legs and the head of the calf – there is nothing worse than a calf which just needs a bit of a pull, but not having the hand strength and grip to get it out. Save a trip back to the shed – keep ropes or chains in a clean box on the bike as well as some at the shed.
Handles for an easy pull – when you have your ropes or chains on the calf, handles will give you better grip to pull, rather than dealing with slippery equipment wrapped around your hands, or putting yourself in a risky position with something makeshift. A calf which is pulled using handles rather than a pulley or jack is far less likely to damage the cow.
Pulleys or calving jack – this is more expensive equipment but well worth the investment. For those tight pulls or when there is simply not enough gumboot grip on wet ground. Check this equipment is in working order before you need to reach for it – a lost bolt or damaged D-link is not what you want to deal with when you are under pressure.
Rectal gloves – this may be controversial but gloves not only keep you clean, they help to keep the cow clean too! Hygiene at calving has the potential to affect cow fertility through bacterial contamination introduced into the uterus from farm arms.
Halter – this may make all the difference in an emergency – a halter gives you an anchor point to stop the cow from getting up or walking away. This may just save having to take her all the way back to the shed or yards for assistance.
Metabolic bags – milk fever goes hand in hand with springer and colostrum mob checks, and is frequently a cause of cows needing assistance to calve. A springer with milk fever is usually at the point of calving. Milk fever will interfere with both the dilation of the cervix and also with contraction of the uterus, so should be treated as soon as possible.
Anti-inflammatories – assisted calvings will benefit from the addition of an anti-inflammatory to the treatment protocol. At a time when the cow is at her most vulnerable to the effects of pain, an anti-inflammatory will hasten the return of her appetite, and assist in the recovery of her reproductive tract following manipulation. Consider withholding periods – a NIL milk withholding product will forestall any mistakes being made further down the track with colostrum going to bobby calves, or when the cow is ready to enter supply.
Snacks – and in the end, don’t run your own tank on empty – it can be tempting to just keep going all day when the jobs are stacking up, but if you don’t look after yourself first, then everything will begin to suffer.
Syringes and needles – there is nothing more frustrating than going to give a cow an injection of pain relief and not having a syringe or needle handy. The emergency vet’s phone number – it’s a great idea to have your vet clinics’ number ready to go – the sooner you can get a vet on their way if they are needed the better.
Lube and lots of it – an essential when calving a cow if you have to get elbow deep.
Frozen gold colostrum and a calf tuber – an assisted calving may mean you end up with a calf that needs some extra TLC to get going. Keeping a few bags of high-quality new-season gold colostrum handy in the freezer can make all the difference to calf survival. Thaw from frozen in warm water at 60C until ready to serve at 37C.
Signs a cow needs immediate assistance with calving:

assistance
Hooves presenting with sole upwards – this is a sure sign of a calf which is coming backwards, or less commonly a calf which is upside down. In both instances, early intervention will improve the chance of getting a live calf. When a calf is coming backwards, its placental blood supply is broken earlier in the calving process due to the position of the umbilicus and the longer time it takes for them to be born. Once the placenta is broken, there is only a few minutes left before the calf dies.
Calf’s head is out but no legs present – It is virtually impossible for a calf to be born head first if both of the front legs are not coming out first. This positioning must be corrected before the pull is made.
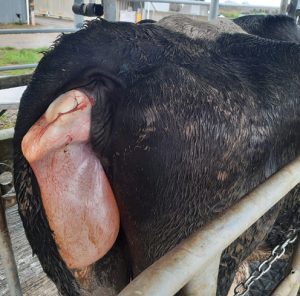
Membranes with placentomes – if the calf has not been born but the cow has membranes with placentomes hanging out, it is a sign of placental separation. The calf will already be dead, but don’t leave her to keep calving on her own – she would have done that already if she had been able to.
No progress being made – if after two hours of active calving there has been no sign of the calving progressing, she is going to need a hand. If different staff check the springers throughout the day, accurate communication becomes critical to catch minor issues before they become major problems.
A cow that you find calving first thing in the morning is likely to have been calving for a few hours already so don’t delay with checking these cows out. Throughout the day, make note of cows which have started calving so you can follow up on them at the next visit. And finally, don’t go to bed on a cow that is calving. You will be far less likely to get a live calf if you wait until the following morning before checking that she is okay.


